Showing posts with label Interior decorating ideas. Show all posts

Wednesday, September 11, 2013

Halloween and Fall Decorative Pillows...TOO DIE FOR!

While out and about the last few days scanning for Halloween décor, I have run across some dang cute Halloween pillows.  I found these beauties at Ross of all places!


It got me thinking. I am sure there are some super cute creations on Etsy. Sure enough, there were.  So many in fact that I couldn't possibly post them all. Here are a few of my favorites.  Some of these could be DIY projects but WOW on some of them! How fun would it be to put a few of these around the house?  There are a ton of designs for other holidays as well.  These are some talented peeps!


Friday, April 5, 2013

DIY Farmhouse bed!

I thought I would share with you one of the projects that I built recently!  This wonderful king size farmhouse bed!  What do you think?  It really wasn't too bad.  I got my plans from Ana White.  She has made it REALLY easy to build her DIY furniture!  She supplies the shopping list, cut list and instructions. I modified the plan when I found another version on her site from someone else who built the same bed.  Here is her link-

I wanted cubbies for storage and also wanted to access the space under the bed between the cubbies. So here is what I did~

I first build 2 sets of cubbies.  Each one is 16" deep x 15" Tall x 80" Long.
I added 1" trim to the front of the cubby to finish the edges which made the depth 17". I attached the bottom trim flush with the inside of the cubby so it raised the height to about 15 1/2".  (Visit the site and this will all make sense!)

Next I built the headboard and the foot board.  I attached the center board of the foot board to the posts with top hinges and a latch at the bottom so that I could open it to access the middle of the bed. 

Finally (After painting everything!) I screwed the headboard and foot board to the cubbies.  I used L brackets in some place to make it even more secure.  I didn't want the bed to move or squeak AT ALL!  :)

Be aware that when you follow Ana's plans she turned her king size bed on its side and so the dimensions are not exactly accurate for a typical king size bed.  READ all of the directions before you begin your project.

The overall cost was about $400 or so.  About 1/4 of what it would have cost me to buy one!  And...I know it is done right and with solid wood. 


Here are the cubbies!  I bought regular old Steralite storage bins from Target and slip covered them with canvas. I wanted BIG bins so this was my best option. 


I simply laid the tote on top of the fabric (one side at a time) and cut each piece about 2 inches bigger than that actual size to allow for the seam.  The exception was at the top.  I wanted the fabric to fold over the top so I added about 5" to the height and used the finished edge of the fabric.


As you can see there is a lip around the top of the bin. Once I sewed the four sides together I pulled the slipcover over the bin (Inside out) and I folded the fabric at the corners and pinned it so that it would fit snug and not fall off of the bin.  I then stitched the mitered corners.  I had to be careful to not sew it too tight because I had to be able to pull it over the bin. Next, I simply adhered Velcro to the bin and the underside of the fabric to attach it. I glued the Velcro to the bin with E6000 glue and held it down with masking tape until it dried. I stitched the Velcro to the fabric.  It's not going anywhere!  I am super happy with the finished project!  I think I will be adding some sort of vintage print to the front of the slip covers at some point but that is another project for another day!


Friday, January 18, 2013

Beautiful, elegant, shabby bedrooms

I have been on a quest to change up my bedroom.  I have slowly been "lightening" up my house and my bedroom has been an ongoing project.  I love the shabby look at these bedrooms but also the clean monotone feel it evokes.  Sometimes "shabby" design can be a bit cluttery but these are a wonderful example of what I call "clean shabby".  

I am currently working on building my new bed and I will post photos soon!


Wednesday, May 23, 2012

Dorm Room Decor~

In honor of the many graduating seniors, I thought I would post some fun, inexpensive dorm decorating ideas.  I was able to share some of these ideas with some of my Young Women at our youth activity last night and it was a lot of fun!

Image small dorm room decorating

Image small dorm room decorating

Image small dorm room decorating

Image small dorm room decorating

Image small dorm room decorating

Image small dorm room decorating


Image small dorm room decorating

Image small dorm room decorating

Image small dorm room decorating

Image small dorm room decorating

Image small dorm room decorating

Image small dorm room decorating

Image small dorm room decorating

Image small dorm room decorating

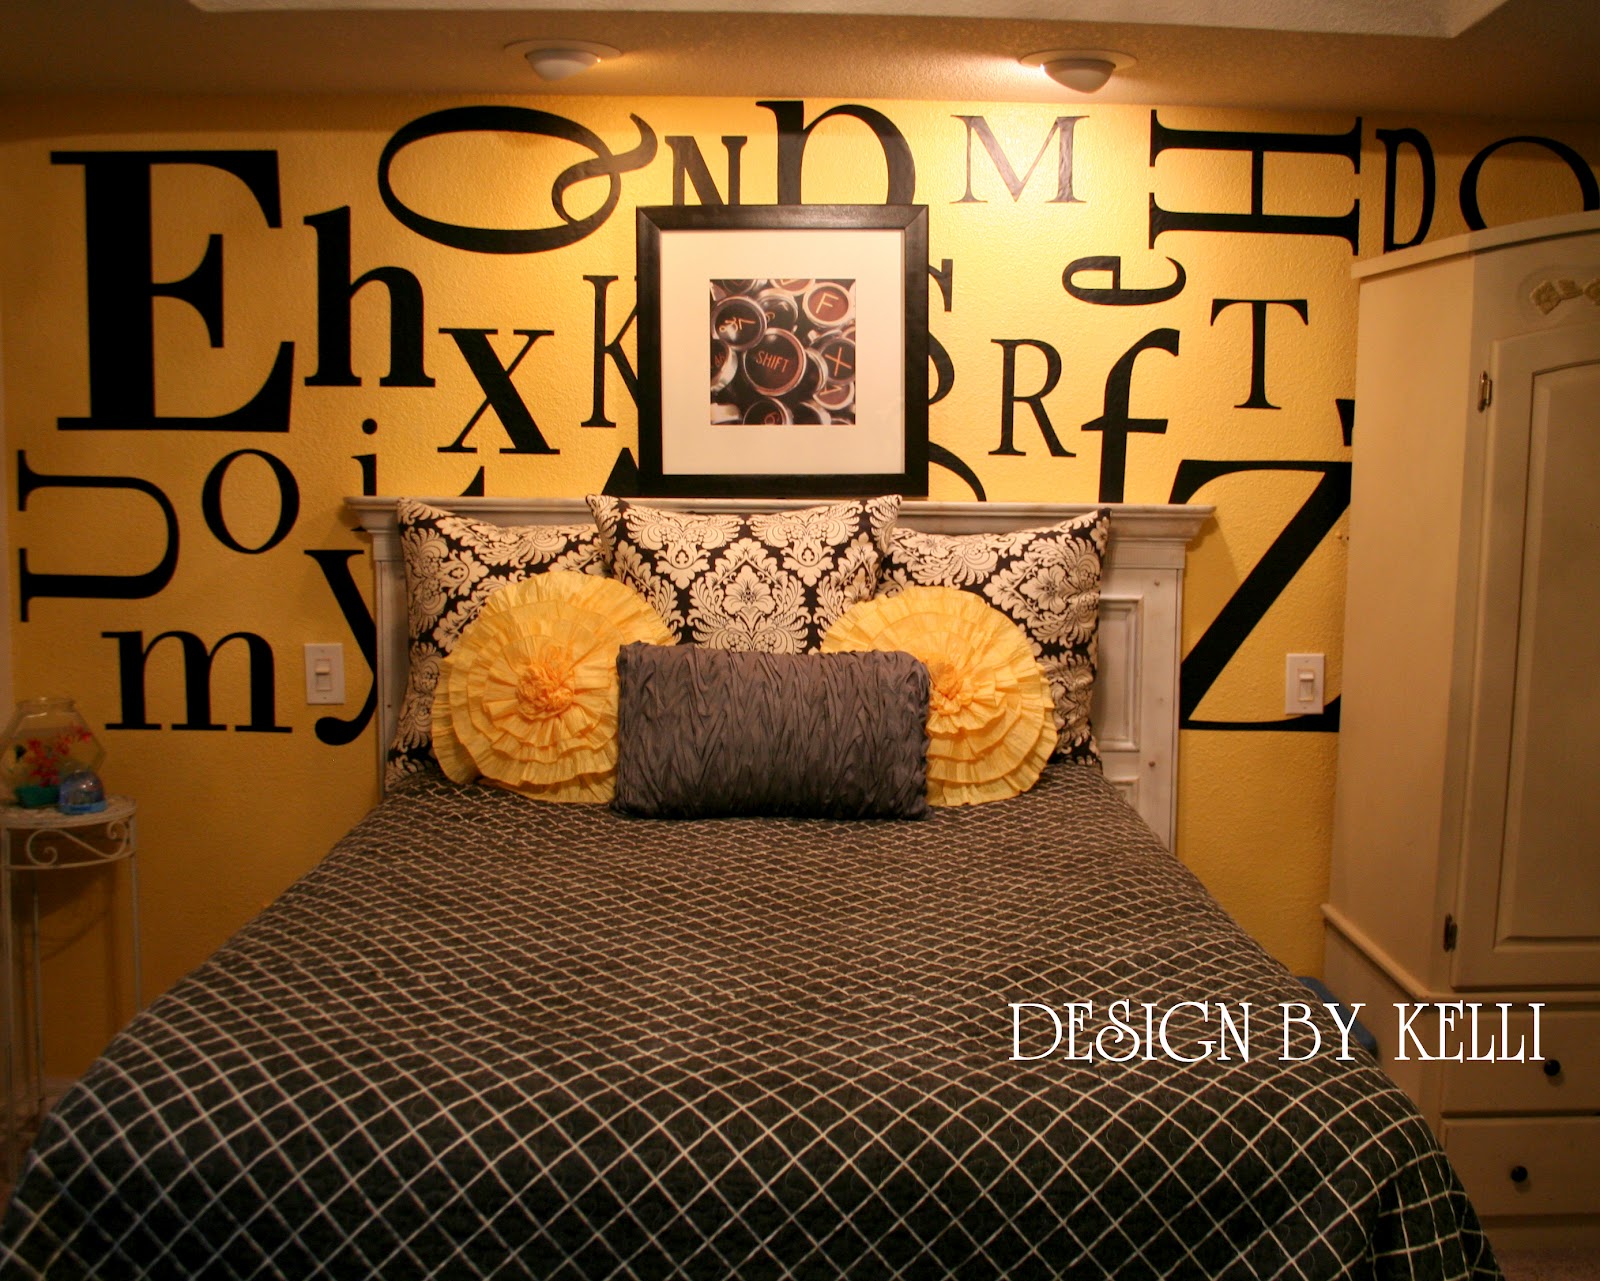
Vinyl decal typography on wall!

I thought I would share one of my designs that I created in my daughters bedroom!  I cut out different sized letters and adhered them on her wall.  Isn't this fun!?  I am pretty happy with the finished product! Yippee!
Image Typography vinyl decal

#vinyldecals, #yellowbedroom, #decorating, #typography

Wednesday, May 16, 2012

Mirrored Cabinets!

OH MY!!!!  I just saw these and I am in love!  I HAVE to do this in my kitchen!  Yes, my kitchen.  Aren't they awesome.  Hmmmm....the wheels are spinning.  Let's see-  I can pop out the center panel of the cabinet door and install a mirror after it has been distressed.  :) 
Up next-  I will do a tutorial on distressing a mirror. 
Stay tuned....

http://houseandpost.blogspot.com

Friday, May 4, 2012

Picture frame arrangement ideas!

We have all seen the beautiful wall of framed photos.  It may not be as easy as it looks to create the perfect layout....that is until now!  As I was cruising Pinterest...(do that a bit too frequently nowadays!) and found this wonderful layout article!  Unfortunately there was no credit link.  I will continue to look for the original post but for now I had to share! 

Once you have chosen your layout, use craft paper or brown paper rolls from your local home improvement store and cut out the correct sized squares and adhere them to your wall.  Once you are happy with the layout find the center and simply hammer your nails into the wall thru the paper itself.  :)

EASY PEASY!!!!!!  Please feel free to share any other tips you have for hanging your artwork!  I would love to hear them~

Friday, March 2, 2012

Repurpose your old doors!

Do you often see old antique doors for sale or even for free?  GRAB them if you do!  There are so many neat things you can do with them.  Re-porpose them in your dining room as a table top! How about a chalk board or room divider?  Take a peek at these wonderfully creative ways in which old doors were used to add a unique design element and create an instant focal point! 

Apartment Therapy

kaboodle.com

Myrepurposedlife.net

Silveradostudio.com

Apartment Therapy

Country Living


Martha Stewart

Sunday, February 26, 2012

Small Laundry spaces!

Like many of you, my laundry area is in a wonderfully tiny hall closet!  I have the itch to do something with it.  Here are some wonderful design ideas where a small closet has been transformed into a beautiful inviting area.  I may even start enjoying doing my laundry!  (I will let you know when I actually put these ideas to work!)  I absolutely love the first one!  The doors in front of the washer and dryer are a perfect way to hide the appliances.
Better Homes and Gardens


Better Homes and Gardens

Better Homes and Gardens

Martha Stewart

Better Homes and Gardens

casadevalentina.com