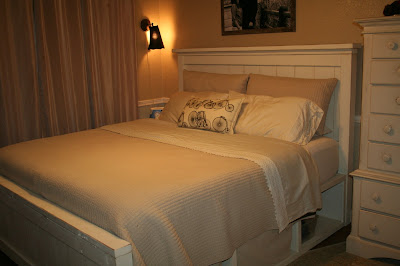
I wanted cubbies for storage and also wanted to access the space under the bed between the cubbies. So here is what I did~
I first build 2 sets of cubbies. Each one is 16" deep x 15" Tall x 80" Long.
I added 1" trim to the front of the cubby to finish the edges which made the depth 17". I attached the bottom trim flush with the inside of the cubby so it raised the height to about 15 1/2". (Visit the site and this will all make sense!)
Next I built the headboard and the foot board. I attached the center board of the foot board to the posts with top hinges and a latch at the bottom so that I could open it to access the middle of the bed.
Finally (After painting everything!) I screwed the headboard and foot board to the cubbies. I used L brackets in some place to make it even more secure. I didn't want the bed to move or squeak AT ALL! :)
Be aware that when you follow Ana's plans she turned her king size bed on its side and so the dimensions are not exactly accurate for a typical king size bed. READ all of the directions before you begin your project.
The overall cost was about $400 or so. About 1/4 of what it would have cost me to buy one! And...I know it is done right and with solid wood.
Here are the cubbies! I bought regular old Steralite storage bins from Target and slip covered them with canvas. I wanted BIG bins so this was my best option.
I simply laid the tote on top of the fabric (one side at a time) and cut each piece about 2 inches bigger than that actual size to allow for the seam. The exception was at the top. I wanted the fabric to fold over the top so I added about 5" to the height and used the finished edge of the fabric.
As you can see there is a lip around the top of the bin. Once I sewed the four sides together I pulled the slipcover over the bin (Inside out) and I folded the fabric at the corners and pinned it so that it would fit snug and not fall off of the bin. I then stitched the mitered corners. I had to be careful to not sew it too tight because I had to be able to pull it over the bin. Next, I simply adhered Velcro to the bin and the underside of the fabric to attach it. I glued the Velcro to the bin with E6000 glue and held it down with masking tape until it dried. I stitched the Velcro to the fabric. It's not going anywhere! I am super happy with the finished project! I think I will be adding some sort of vintage print to the front of the slip covers at some point but that is another project for another day!


you'Re amazing kelli. that looks awesome. great job!
ReplyDelete