Showing posts with label Decorating. Show all posts

Wednesday, October 2, 2013

Halloween Decorating ideas 2013

I had a great time decorating this year.  Earlier I posted some unique ideas on adding different colors to your Halloween décor.  This year I added in some blue pumpkins and dressed up some of last years interior decor.

OUTSIDE- Here is my front porch  and little cemetery.  I threw in some blue painted pumpkins this year.  (Dollar Tree pumpkins that I painted that is!)  I mixed in some glittered black and painted gold and white pumpkins.  I love to add sparkly picks to the stem part of some of my pumpkins so I randomly placed a few of them in the design.  The black birdcage is filled with a gold and black pumpkin and there is a large spider and crow making themselves at home.

I also added some purple and green foliage and a couple purple pansies.  Added the wreath....(tutorial in previous post), and VIOLA! Anytime you add some natural elements to you holiday décor, it freshens it up an adds a certain amount of beauty that cannot be duplicated with faux plants. Grab inexpensive plants and intermix them and you will be amazed at the difference!   Oh~  I did add my staple cemetery and witch as well!  Still have a few things to do....


Create an instant cemetery in your flower garden!  It's the perfect place to put those creepy headstones and ghoulish figures!

This was a new addition this year.  I love the way it turned out!  I grabbed the ideas several years ago off of the internet.

INSIDE-

I put these skeletons together last year.  I just adhered the skeleton heads to some old candle sticks that I picked up at an estate sale.  This year I added burlap collars to them by gathering some burlap and gluing it on the top of the candlesticks.  I also added some vintage looking cone hats.  I used some cute scrapbook paper to create the cone and added a strip of packaging paper to the rim.  I folded the packaging paper in an accordion style to create some texture and then added an orange sparkly spider to the front!

My porcelain skeleton got to dress up this year too!
As for the cloche over the witch image...I couldn't find it this year!  So I used a vintage mason jar instead.  I just turned it upside down and put the print inside the jar.


Here's my semi-homemade chandelier again.  See here for how I upscaled this little beauty!

 This was my project today.  I just cut out some vintage sillhouetts with vinyl and put them on the battery operated candles. I LOVE them!

More tomorrow!

Wednesday, June 6, 2012

Kitchen Re-Do! Painted cabinets and more~


And now for the kitchen!  This is the before-

                                                                            Before


AFTER!


Glaze highlights all of the detailing in the cabinets


I made burlap roman shades.  YES, made them!  This gal has an easy DIY tutorial on how to make them yourself!  (Found her on Pinterest of course!) 

I added a simple valance on top of the Roman Shades,  No sew! I used the fusing tape and an iron to make this.  Super easy!

Lastly, I added some definitions to my glass canisters.  I love the way they turned out.  I must say however, I won't be selling these as the words are so small it is a nightmare to weed the negative parts of the vinyl out of the solid sheet!  If you just want the labels, ie. SUGAR, FLOUR etc.  No problem!  I can do that.  It' the little itty bitty words that were not fun!


This is always time consuming but well worth the effort!  It is actually a simple process. 

Here are some simple step by step instructions~

Quick glance guide-
1- Remove doors and hinges
2-Label doors
3-Clean doors and bases with TSP
4-Sand
5-Prime
6-Paint
7-Glaze
8-Seal
9- Hang

Detailed Instructions-

1-  Remove Each door and hinge ONE BY ONE.
 
2-  Label each door so that you know where it goes. 
(I know you may think that this is a silly step and your thinking- "Of course I will know where they will go"-      TRUST ME....label them.  It is much easier!  I wrote inside the hole where the hinge fits because  it provided enough room to write without it being covered with paint.  Another option is to use painters tape on the back side if you are not planning on painting the inside of the cupboard doors.)  I labeled them "U" for upper and then a #.  For example U1, U2 etc.  L for lower-

3.  Use "TSP" to clean the fronts of your doors and cabinet bases. This is an important step.  It will get all of the hidden grease and grime off of your cabinets.  It's there even if you don't see it! You can get this at your local hardware store.

4. Lightly sand or use a deglosser/liquid sander solution.  This will give the primer a better surface to stick to.  DON"T SKIP THIS STEP!  This is key to a good, long lasting finish.  I would recommend sanding over the liquid because it is a fail proof method.

5. Next prime.  I prefer "Gripper" brand primer as it is amazingly durable.  You can find it at Home Depot.  I cut into the grooves with a paint brush and then immediately roll over it with a smooth sponge roller.  This will prevent brush strokes and give a nice smooth finish.

6.  Time to paint!  Apply at least 2 coats of your paint in the same way you applied your primer.  Use a brush and then roll over it with a sponge roller.  BTW-  The paint people (at Home Depot) tried to tell me years ago when I started doing this not to use the sponge roller because it soaks up to much paint.  Don't listen to them.  :)  This is the only way to get the pro finish you want.  It doesn't soak up that much paint. 

7.  Lastly, if you want to glaze your cabinet doors, mix one part paint, (espresso)  to 2 parts glaze.  Brush the glaze over the doors where there are grooves.  I brushed mine over the beveled part of my doors.

Next, with a lint free cloth, rub away the glaze so that it leaves behind a rich dark color in the grooves of the door.   If you are picky like me, you can methodically pull your rag down one side of the groove and then the other to be sure the glaze leaves a nice straight (ish) line.

I ran a line of color around the edges of the doors as well even though there was no groove.  I just liked the look of it.  Again, I pulled the rag down both sides of the line to get an even line.  (If this seems confusing I basically wiped away the paint on each side of the line so that all that was left was a thin line.) You don't want it to be perfect because it is suppose to look a bit aged.  :)

8.  Last, (because I go a little over the top)  I applied a coat of glaze over the entire door to seal everything and protect the paint!  This makes it easier to clean and since your kitchen gets a lot of wear and tear, it is best to seal everything.

9. Once the cabinet bases and door are dry...(BE PATIENT,)  you get to hang them and admire all of your hard work!

Tuesday, June 5, 2012

Hand painted furniture tutorial!

I have been having way to much fun re-doing my kitchen and some furniture the last couple weeks!  I thought I would show the results!  First the cabinet-

I found the cabinet at an estate sale a couple weeks ago hiding in that back of someone's garage.  Of course it caught my eye and I convinced my hubby that I HAD to have it!  :) 

I brought it home and got to work!  After sanding, priming with "GRIPPER" primer and painting it, I distressed it with paint using an antiquing technique with paint!  I then rubbed it down with some burn sienna paint tint to give it an aged look.  I love how it turned out!  I will post the pics of the kitchen tomorrow! :)


Wednesday, May 23, 2012

Dorm Room Decor~

In honor of the many graduating seniors, I thought I would post some fun, inexpensive dorm decorating ideas.  I was able to share some of these ideas with some of my Young Women at our youth activity last night and it was a lot of fun!

Image small dorm room decorating

Image small dorm room decorating

Image small dorm room decorating

Image small dorm room decorating

Image small dorm room decorating

Image small dorm room decorating


Image small dorm room decorating

Image small dorm room decorating

Image small dorm room decorating

Image small dorm room decorating

Image small dorm room decorating

Image small dorm room decorating

Image small dorm room decorating

Image small dorm room decorating

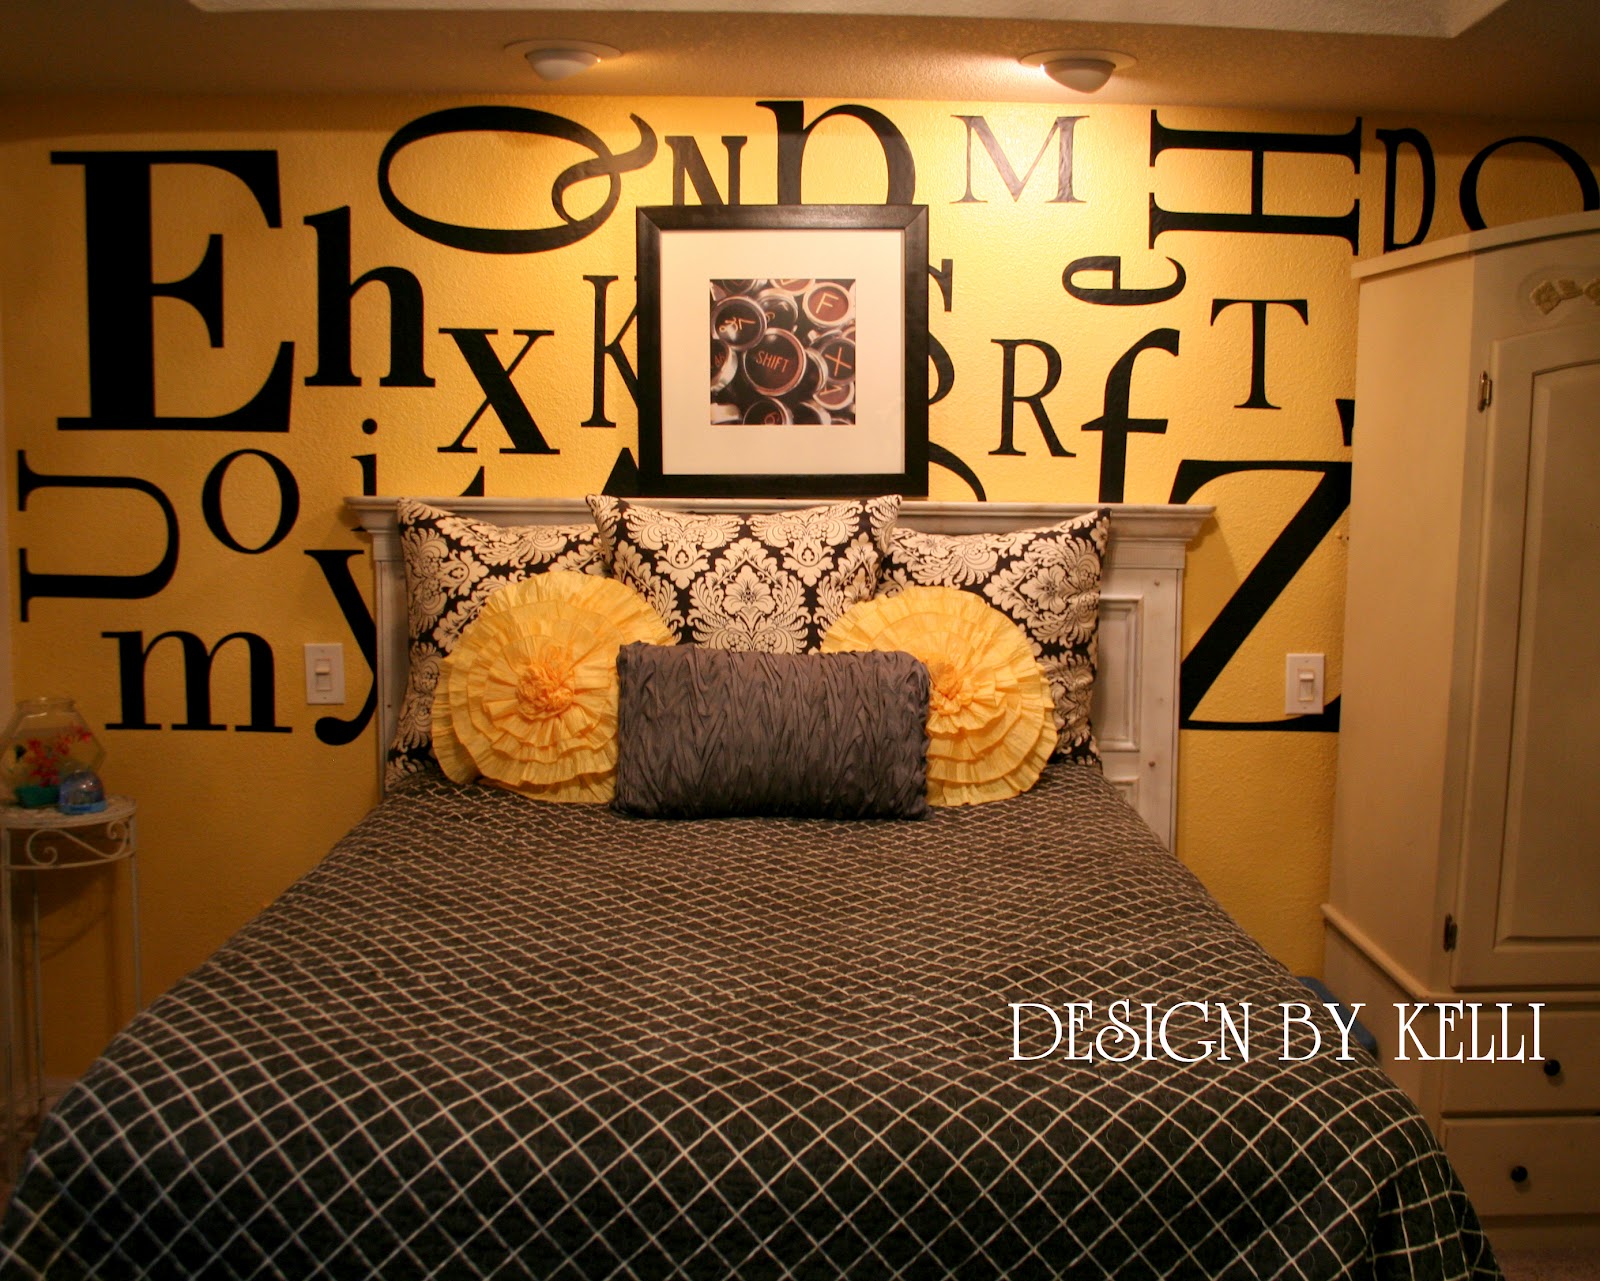
Vinyl decal typography on wall!

I thought I would share one of my designs that I created in my daughters bedroom!  I cut out different sized letters and adhered them on her wall.  Isn't this fun!?  I am pretty happy with the finished product! Yippee!
Image Typography vinyl decal

#vinyldecals, #yellowbedroom, #decorating, #typography

Wednesday, May 16, 2012

Mirrored Cabinets!

OH MY!!!!  I just saw these and I am in love!  I HAVE to do this in my kitchen!  Yes, my kitchen.  Aren't they awesome.  Hmmmm....the wheels are spinning.  Let's see-  I can pop out the center panel of the cabinet door and install a mirror after it has been distressed.  :) 
Up next-  I will do a tutorial on distressing a mirror. 
Stay tuned....

http://houseandpost.blogspot.com

Friday, May 4, 2012

Picture frame arrangement ideas!

We have all seen the beautiful wall of framed photos.  It may not be as easy as it looks to create the perfect layout....that is until now!  As I was cruising Pinterest...(do that a bit too frequently nowadays!) and found this wonderful layout article!  Unfortunately there was no credit link.  I will continue to look for the original post but for now I had to share! 

Once you have chosen your layout, use craft paper or brown paper rolls from your local home improvement store and cut out the correct sized squares and adhere them to your wall.  Once you are happy with the layout find the center and simply hammer your nails into the wall thru the paper itself.  :)

EASY PEASY!!!!!!  Please feel free to share any other tips you have for hanging your artwork!  I would love to hear them~

Thursday, April 26, 2012

Dorm Room Decorating!

In honor of all of the upcoming graduating seniors I thought it would be fun to post some easy, inexpensive dorm decorating ideas!  I had the opportunity to share some of these ideas with my Young Women at our youth activity last night and I thought it would fun to share them with you today~

Whether you are moving into an apartment, dorm or studio, the hard truth is that most students have a shoe string budget and decorating is at the bottom of the budget.  Think outside of the box.  Use what you have and save of storage-  Yard sales and thrift stores can be a great resource for fun purchases.  3M removable hooks will be a must have as most student housing does not allow holes to be put in the walls.
Use your a cute pair of heels for bookends!  How about creating an artwork wall with your hats, purses or scarves!  Take a peek at some of these photos.  They are all inexpensive and very easy~


Image small dorm room decorating 
Use different sized embroidery loops and mix and match fabric to add color
to your room! Hang it with twine or 3M removable hooks!
Choctawk


An easy way to add color to your walls is to hang fabric.  No need to
invest in expensive fabrics, simply find a sheet, inexpensive drapery panel
and hang it with twine or a rod using 3M removable hooks!
This works great for a headboard as well!  Define the head or your bed
with a section of fabric~

Of course vinyl decals are an inexpensive way to add personality to your
boring walls!  Use quotes, monograms or decorative designs to add your own
flare!  They are easy to install and easily removed~


I LOVE this idea!  So easy to do!  Use paper doilies, (You can find these
at your local dollar store!) and hand them with tape, ticky tack or twine.
SOOOOO cute!

This is a really easy way to add color to your walls.  I believe these are paint sample
sheets that you can get at Benjamin Moore.  This is an easy way to create a color
blocking design without painting.  I would recommend decoupaging the paper to
protect it.
Another variation of color blocking with scrapbook paper!  You can purchase
an entire coordinationg stack pack of scrapbook paper at Joannes for only $10
when you use one of their coupons or wait for them to go on sale..(which is frequent)
Lovely Undergrad


This is a crazy but super fun idea!  I just had to post it. :)
The uncommon perspective
I loved this room.  It is a bit more over the top but I wanted to share it because it
is a great example of what is possible in such a small space.  Frequent yard sales, thrift stores
and fleas markets and you are bound to fin treasures for next to nothing!

This is too cute!  What and easy way to create dramatic art and useful storage
all at the same time!
pbteen

Large posters, cork boards and frames are a great way to dress any drab space
and add some of your personality!
cool-kids-rooms